How to Prepare Your Design for T-Shirt Printing Without a Designer
Ever had a brilliant t-shirt idea strike you in the shower or during a walk with your dog? Maybe it’s a witty slogan, a sketch from your notebook, or just something hilarious your friend said at brunch. Whatever the spark was, you thought, “This would look amazing on a t-shirt!”—and then that little voice in your head chimed in: “But I’m not a designer.”
Well, here’s the truth: you don’t need to be one.
Today, you can turn that brilliant idea into wearable art, even if your only design experience is choosing the right Instagram filter. Thanks to user-friendly tools and a little prep work, getting your design ready for t-shirt printing is more accessible than ever—no expensive software, no professional background, and no creative block required.
Let’s walk through the process step by step—real talk, no jargon—so you can bring your t-shirt dreams to life without breaking the bank (or your brain).
Step 1: Start with a Clear Idea
Before you touch a single design tool, ask yourself: What am I trying to say with this shirt?
Is it a bold statement? A minimalist graphic? A tribute to your favorite band, dog, or inside joke?
Jot your idea down in words. Sketch it on a napkin if that helps. Having a clear intention will help you make better decisions later—like choosing colors, fonts, or whether your design should scream “look at me!” or whisper something only a few people will get.
Pro tip: Keep it simple. The best t-shirt designs are often the ones that communicate a message instantly. Think Nike’s swoosh, or those “I ❤️ NY” tees.
Step 2: Choose the Right Tool
So, you’ve got your idea—now you need a way to bring it to life.
Enter modern design platforms.
Once upon a time, you needed expensive software and a three-month crash course in graphic design. Not anymore. Now, there are beginner-friendly, web-based tools that guide you from blank canvas to print-ready design with zero intimidation.
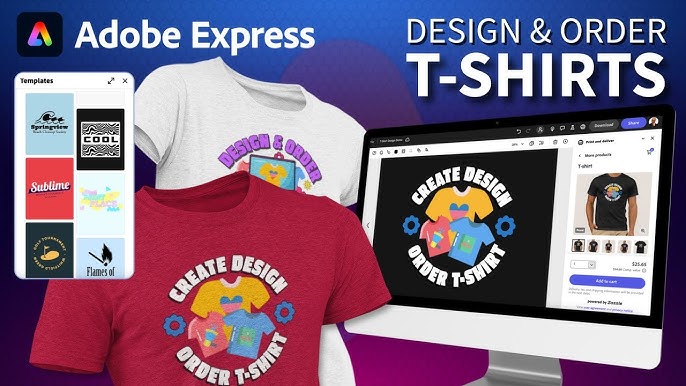
One great option for this is shirt printing using Adobe Express. It’s designed for people just like you—those who know what they want but don’t have time to learn Photoshop or hire a designer. You can choose from thousands of templates, icons, and fonts, drag and drop elements, and export a file that’s already optimized for t-shirt printing.
Honestly, it’s kind of addicting—like Canva, but with more power under the hood.
Step 3: Keep Sizing and Resolution in Mind
Okay, let’s talk technical—but I promise, not in a scary way.
T-shirts are printed in real life. That means your digital design needs to be high-resolution so it doesn’t come out blurry or pixelated.
When you’re creating your design:
- Use a 300 DPI (dots per inch) resolution. This ensures your image stays sharp on fabric.
- Set your canvas to at least 12″ x 16″ (3600 x 4800 pixels). Most print areas fall in this range.
- Save it as a PNG with a transparent background. This way, you won’t end up with a weird white box around your design.
If that sounds complicated—don’t worry. Tools like Adobe Express handle a lot of that behind the scenes. Just make sure to export your final design in high resolution, and you’re golden.
Step 4: Mind Your Colors (and Your Shirt Color)
Here’s something people forget: your design and your shirt are a team. They have to work together.
Say you design a beautiful white graphic. If you print it on a white t-shirt… well, it disappears. Not ideal.
Think contrast. A dark design pops on a light shirt, and vice versa. If you’re unsure what looks good, test different combinations in your design tool. Most platforms let you preview your artwork on different shirt colors so you can see how it’ll look before you print it.
Also, keep in mind that what you see on your screen won’t always match the exact printed colors. It’s a good idea to avoid super-subtle gradients or very light tones unless you’re working with a printer that offers color matching.
Step 5: Fonts Matter More Than You Think
If your design includes text—and let’s be honest, most great shirts do—it needs to be legible and well-chosen.
Some quick guidelines:
- Use no more than two fonts. More than that, and it gets messy.
- Choose fonts that fit your vibe. A playful message might need a handwritten font, while a bold statement works best in strong sans-serifs.
- Make it readable from a distance. Tiny, curly fonts are cute but not always practical on cotton.
And please—don’t just go with Comic Sans. You’re better than that.
Step 6: Test It Out
Before you hit order, test your design on a mockup.
Mockups are digital previews of how your design will look on an actual t-shirt. You can find free mockup generators online, or use the preview function inside Adobe Express. Seeing your design in context often reveals things you’d miss otherwise—like text that’s too low or colors that clash with the shirt color.
Also, don’t be afraid to ask for feedback. Show a friend, post it in a group chat, or even share it on social media for opinions. Fresh eyes catch things yours won’t.
Step 7: Choose the Right Print Method
There are a few ways to print t-shirts, but here are the most common:
- DTG (Direct-to-Garment): Great for complex, colorful designs and small batches.
- Screen printing: Best for bold designs and large orders. More prep, but cost-effective at scale.
- Heat transfer or vinyl: Often used for custom orders like sports jerseys. Sharp results, but less breathable.
Your printer or platform will usually let you pick. If you’re just starting out, DTG is a safe, beginner-friendly choice that delivers solid results.
Conclusion: You’ve Got This
You don’t need an art degree to design something meaningful. All you need is your idea, a little patience, and the right tools to bring it to life.
What started as a funny quote or doodle could become your next favorite shirt—or even the beginning of your own mini clothing brand. We live in a time when creativity is no longer limited to the “creative professionals.” It’s democratized, and it’s waiting for you to dive in.
So take the leap. Open that design tool. Play around. Mess up. Fix it. Print it. Wear it proudly.
You’ve got more design skills than you think—and now you’ve got the roadmap to prove it.